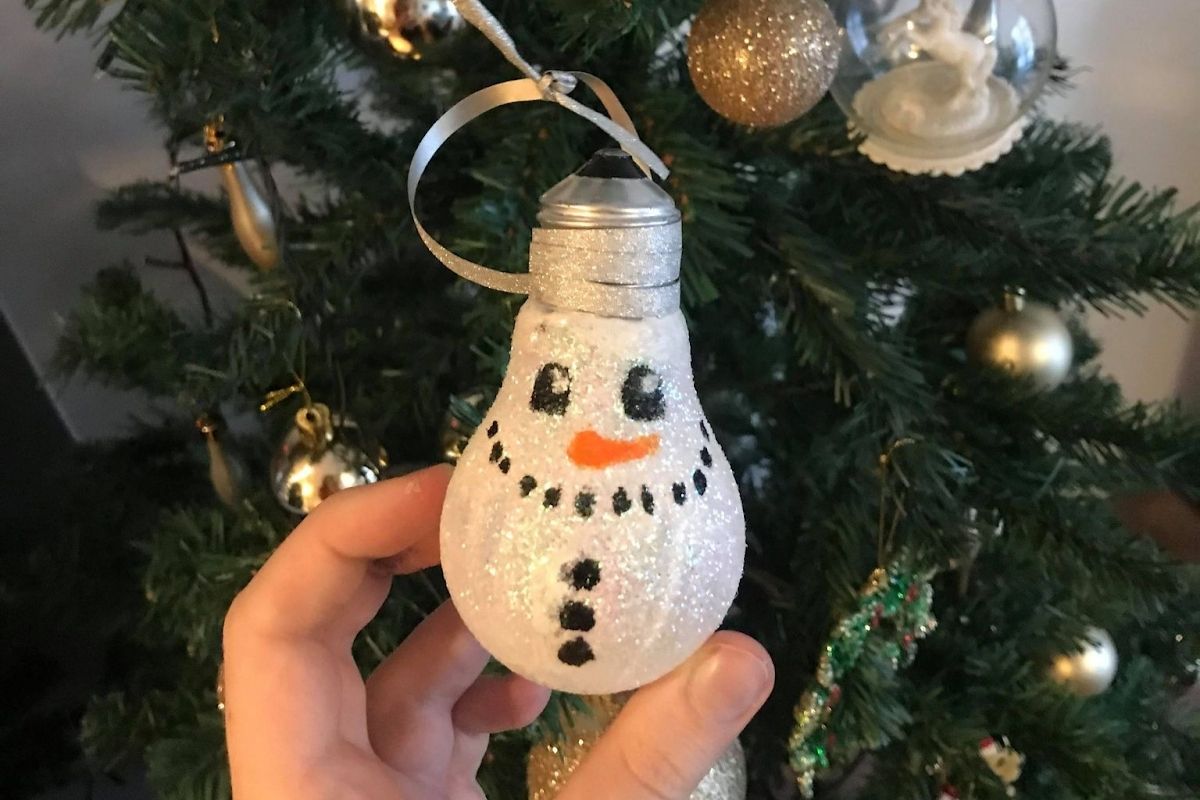
1 - Snowman bauble
Why not get together and use an old light bulb to create your own bauble? Be careful, though. If you’re a child, make sure you have an adult with you to do this.What you’ll need:
- 1 x lightbulb
- Orange, white and black paint
- 1 x tube of eco white glitter
- 1x PVA glue
- Paintbrushes
- Ribbon for hanging the bauble
- (optional) Stick on eyes

Step 1: Lay the bulb down on one side, and paint with the white colour.
This can get messy! Keep painting until you’ve covered it all, and leave it for a few hours to dry.
Once it’s dry, paint over it once more to completely cover the bulb. It doesn’t matter if there are a few paint streaks, the glitter will cover that up.

Step 2: Use your biggest paint brush to coat the light bulb with PVA glue.
Almost immediately after you do this, pour the eco white glitter all over the light bulb. Try and do this in a space where the glitter can easily fall into - we used a cardboard box.
Leave this to set for a few more hours - ideally overnight.

Step 3: Grab your black and orange paint, and draw on the facial features of a snowman.
You can be as creative as you like - if you fancied, you could even turn the top of the lightbulb into a hat for him!

Step 4: Get your ribbon (or if you don’t have any of that hanging about, just use string).
Tie it around the head of the lightbulb, and tie a knot at the back of it. Make sure there’s enough left to tie onto the Christmas tree, and make a second knot. Then, hang it on the tree!

2 - Draw your own wrapping paper
Kids love drawing, and when there’s not many other places to go, many of us are watching Christmas movies and Disney films. Why not combine the two and turn your drawing into handmade wrapping paper? Many of us have these items around the house:
What you’ll need:
- 3-4 sheets of paper
- Coloured pencils and/or paint
- Sellotape
- (Optional) Ribbon
Step 1: Grab a sheet of paper and choose a character to draw.
For this instance, we’ll choose The Grinch. You can find a step by step drawing tutorial for The Grinch here.

Step 2: Draw The Grinch, and make sure to use pencil in case you need to rub out any mistakes
But make sure you use quite a dark pencil, as you don't want to paint over all your hard work when it comes to colouring him in! If you’re not feeling confident in your drawing skills, why not pick up a paint by numbers?

3 - Gather your paints or colouring pencils, whichever you have around the house.
And mix your colours! Remember:
- Blue + Yellow = Green
- Yellow + Red = Orange
- Red + Blue = Purple
- Red + Green = Brown

Step 4: Leave your paintings to dry.
Depending on the size of your paper (or present), you might only need one, but its always fun to do a couple. If it’s a present for a Disney fan, why not attempt their favourite Disney character?

Step 5: Wrap your present!
If you have any ribbon around, tie it over the present for that extra finished look.

3 - Glittery wrapping paper
If you have any glitter laying around the house in a box that you haven’t picked up since 2016, this one's for you!
Many of us have brown paper laying around too, and these two things go together to create your own classic Christmas paper with your own touch.
If you don’t have any glitter around and don’t want to purchase any for environmental reasons, you could just do this with a felt tip pen.
What you’ll need:
- 1 x piece of card
- 1 x roll of brown paper
- 1 x PVA glue
- 1x eco glitter tube, colour of your choice
- Sellotape
Step 1: Cut out a Christmas tree shape on paper or card (preferably card because it won’t stick as easily).
If you have a wrapping paper set, often you’ll get Christmas tree style decorations, which you can also use:

Step 2: Place the tree shape on the paper, which should be on a flat surface.
Use a brush to paint the PVA glue around the edges of the tree. Then straight away, remove the cardboard tree shape and add the glitter to the area. Don’t worry about being precise - it will only stick to the areas with glue.

Step 3: Shake off the glitter, and pour it down the paper roll so that it all sits in the same place.
Then, gently, tip the paper so that the wasted glitter pours back into your pot.
You should then be left with a glitter outline of a tree, of which you can do as many, or as few times as you wish.
This is a great, quick activity to do with the family! Who can get the best shape?

4 - Make your own Rudolph
What is Santa without his reindeer? Put on a film, and make your own bauble, or hanging of Rudolph. We’ve used a lightbulb on this, but you could easily make your own Rudolph out of a cardboard from your latest online order - whichever you have around your house.
Supplies:
- Cardboard - 1 x piece
- 1 x Lightbulb
- Red, yellow and blue paint
- Stick on eyes, if you have them. If not, add black and white paint.
- Sellotape
- Scissors
- Ribbon to hang
Step 1: Draw antler shapes onto a piece of cardboard.
Cut these out, and leave on the side. They don’t need to be perfect, since you’re drawing freehand!

Step 2: Make your brown.
To make brown, you first need to make an orange. Mix red and yellow together, and then add in blue. To make your perfect brown, you may need to add in little drops of each colour until you get the right colour.
Once you have your chocolatey brown, paint it onto the cardboard cut outs, and all over the light bulb. Leave to dry for at least 3 hours.
Step 3: Once your brown is set, paint a red nose on the bulb.
Do this as big as you want, as Rudolph is famous for his big red nose! Leave to dry for one more hour.

Step 4: If you have any stick on eyes, add them to the top of the bulb.
If not, paint on a set of eyes.

Step 5: Get the Sellotape and tape the antlers onto the back of the lightbulb.
If you fancy hanging it from the tree, get some ribbon or string and tie to the head of the bulb to hang it from.
Ta-da!

5 - Magazine gift wrap
If there’s one thing most of us always have in the house, is an old magazine you haven’t got around to reading or throwing away. Well this year, you can make good use of them!
Many magazines, especially once printed for Christmas time, will be full to the brim of festive images that once you’ve read, you can pass onto someone else on Christmas morning when they open their gift.
Supplies:
- 1x pair of scissors (with the supervision of an adult)
- 1x roll of Sellotape
- 1x magazine

Step 1: Cut the magazine on the page of your choice.
Also cut the page behind it, as you’ll need to double up so the gift isn’t visible!

Step 2: Sellotape the pages together on the edges.
Follow step 1 until you have at least three separate sheets.
Step 3: Fold the pages over your present.
Make a note to show the sides you’ve chosen, and not the opposite side of the page.

Want to add a ribbon? Read on..
Step 1: Cut out a small rectangle from the magazine.
And fold it in half.

Step 2: Cut thin lines down the paper.
About three quarters of the way down. Don’t cut all the way.

3 - Tape the bottom ends together in a cylinder shape.
Then, cut four straight lines into the bottom cylinder and tape onto the gift. Mess up the strips a little, and you have a DIY ribbon!

Comments (0)
Back to Upcycling Tips